

Part one: Planning, leveling & removing septic tank
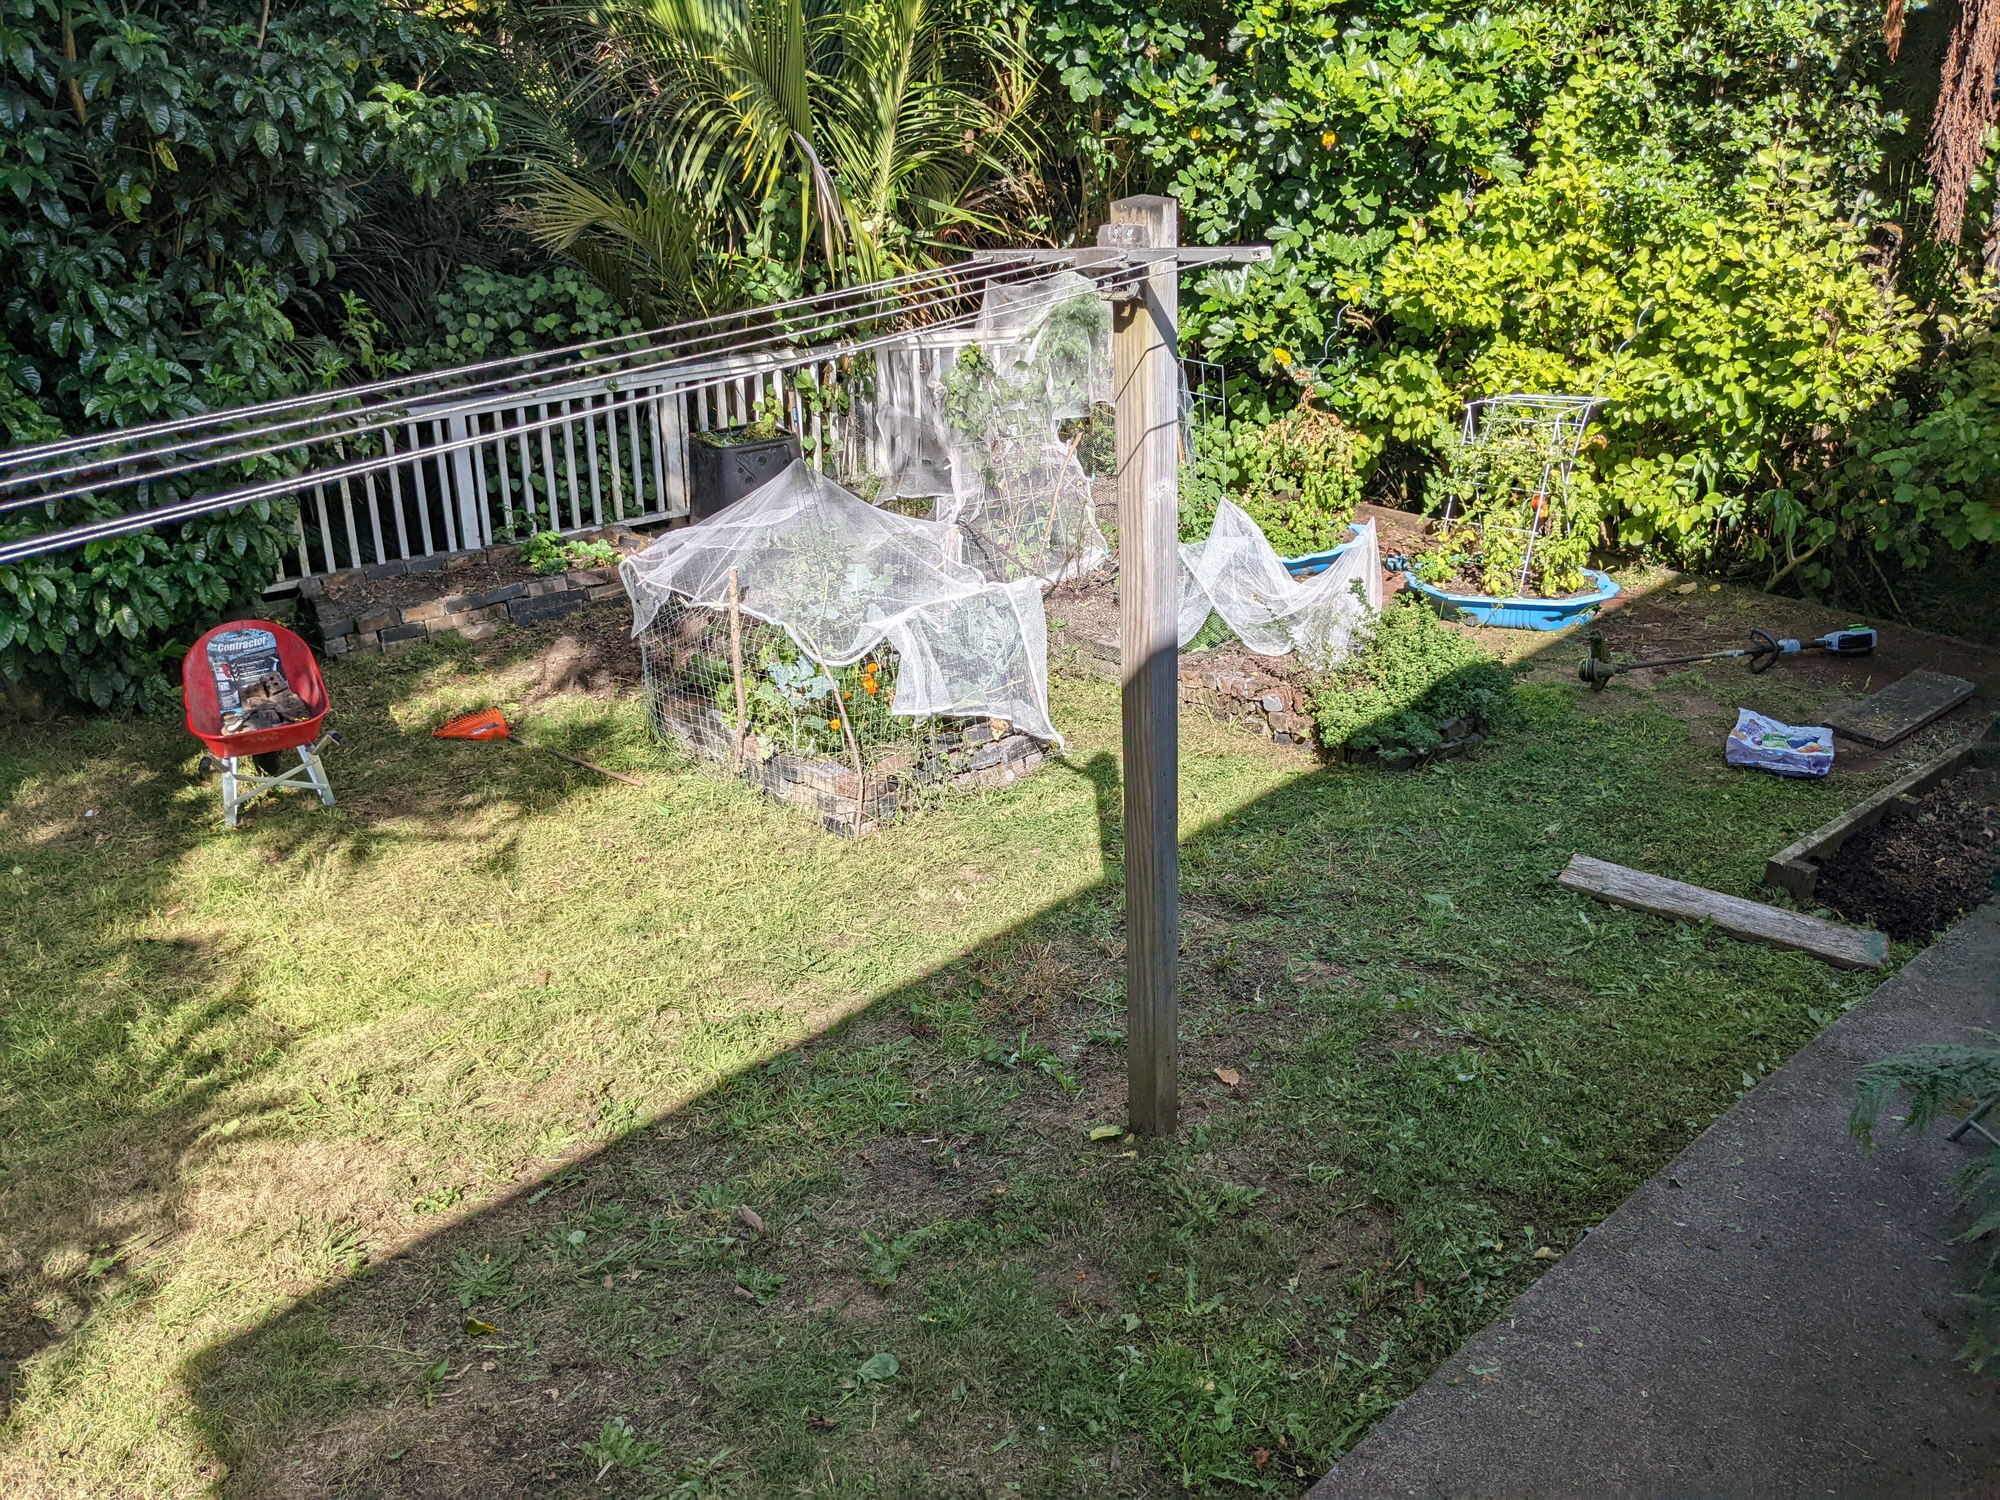
Our backyard has always been the ugly part of our outdoor area. Though it's quite large and has nice green surrounds, it has never looked great. We also couldn't make good use of it, given that it was sloped and quite uneven in places, making it hard to maintain and. Hence, I decided to level it and to put a retaining wall in.
How to determine the height of a retaining wall?
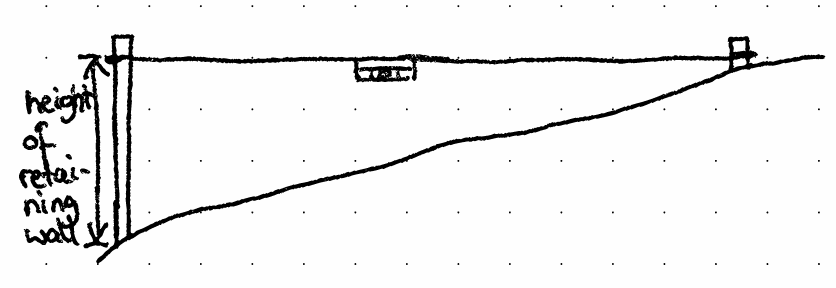
The first step was to determine how high the retaining wall would be that I need to build. For that I put a peg into the ground at the lowest point and one at the highest point, that I wanted to dig up to. Then I connected them with a string line which had a line level attached to it (a spirit level which attaches directly to string lines). Making sure that the string line was level, I measured the distance off the ground (of the stick at the lower ground) to where the string line was. The result was that I would need to build a 0.8m high retaining wall (I know you can't tell from this picture that it's such a slope). That turned out to be accurate.
Do I need council approval for my retaining wall?
The next step would be to check whether you will need council approval to build your wall. My friend said, that you don't need one, as long as your wall is under 1m high, which is usually true, however, it's best to check anyways. For instance when I went onto my council website, I learned that you need council approval if you don't add a drainage solution to your wall, as holding rain water will add additional weight to the wall. Another thing to consider is where your property boundaries are or whether you will have any surcharge on the wall, e.g. if you're going to use it to park your car on the higher ground. In my case our house was on the higher ground, so my architect friend suggested checking in with a structural engineer to make sure that the weight of our house wouldn't put pressure (surcharge) onto my retaining wall. I did so and found, that our house was far enough away from the wall to not have any surcharge. Had that not been the case, we would have had to to structurally engineer the wall and get council approval after all. That gave me some sleepless nights. So, make sure you're onto what your council requires from you, their rules are there for a reason. Auckland council has a tool for this: https://www.aucklandcouncil.govt.nz/building-and-consents/building-renovation-projects/build-retaining-wall/Pages/check-need-consent-build-retaining-wall.aspx
Will there be pipes in my way?
When doing ground work you should always make sure that you don't hit any water pipes while digging (especially if you plan to use a digger). Auckland council has a website, where you can look up all the connections that are in place for your property: https://geomapspublic.aucklandcouncil.govt.nz/
You simply enter your address and select "Assets" from the menu and then tick "wastewater" and "water" under the "Underground services". You might not know where exactly they are located but it will give you a rough idea and you'll know what the areas are that you have to be careful around. In my case there was a water pipe, and I needed to make my retaining wall shorter than initially planned, so that I wouldn't have to build on top of the pipe.. I like how it's turned out in the end though.
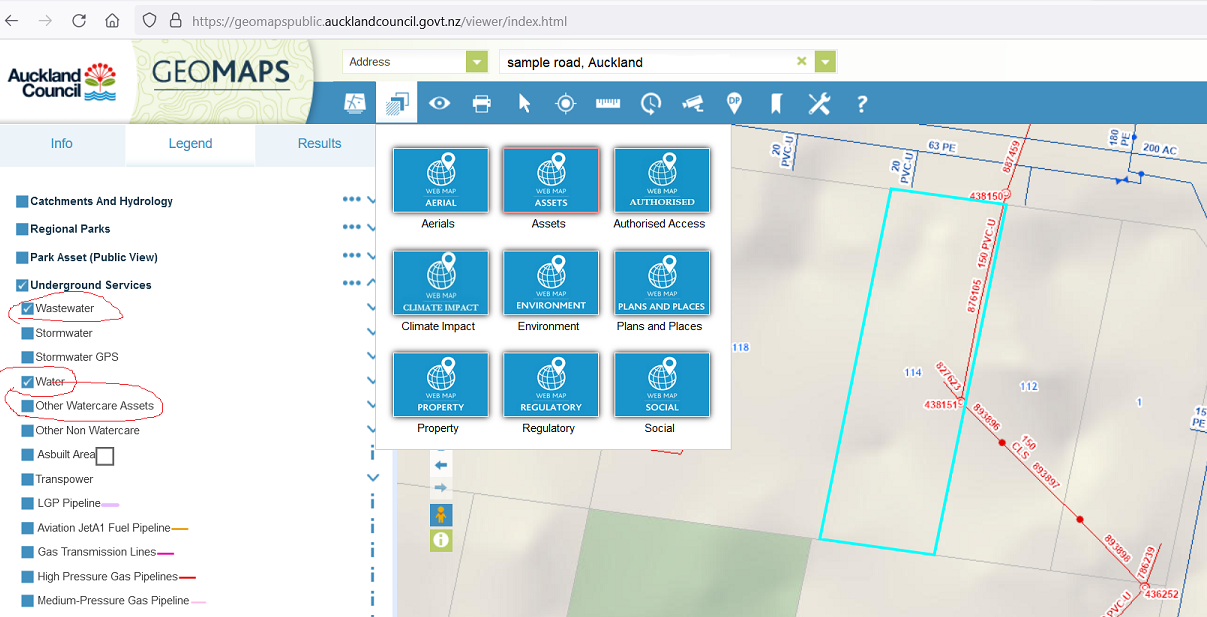
On a side note, it's really interesting to click around in this tool, as you can learn heaps about your property. E.g. they have air shots of your property going way back and you can see how it has changed.
Clear your site
Before I could get started, I needed to clear my site. This might not seem significant, but it just adds to the length of the project. I spent a couple of days moving the garden beds I had made up of bricks and removing the rather ugly paving that the previous owners had laid. I also dug out the old washing line in the process.
How to level your yard
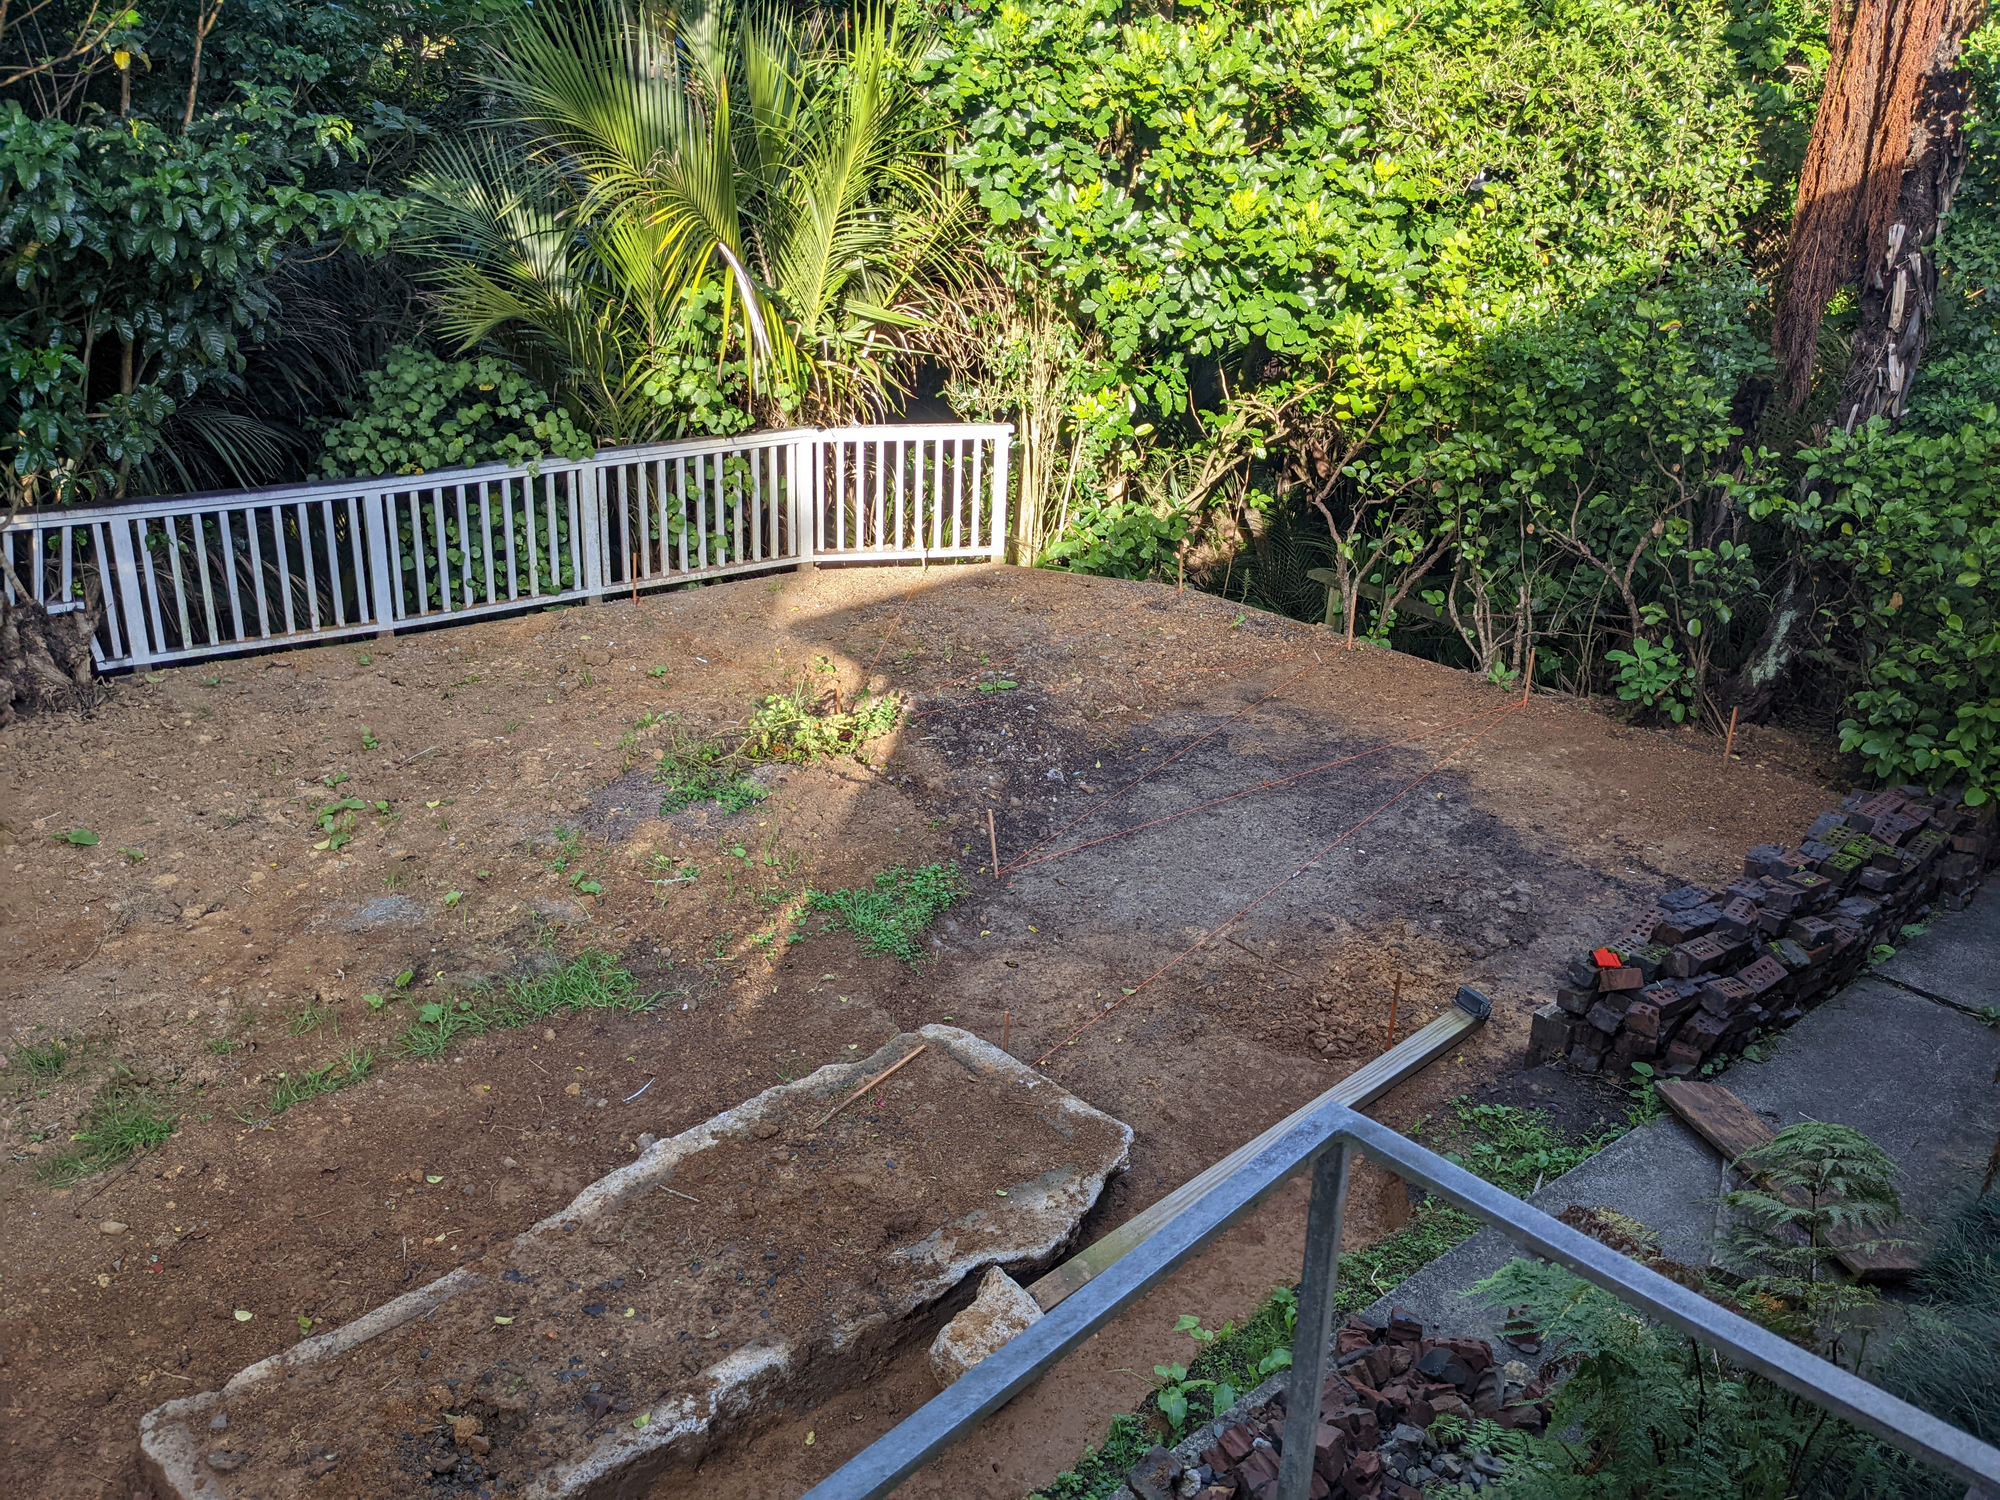
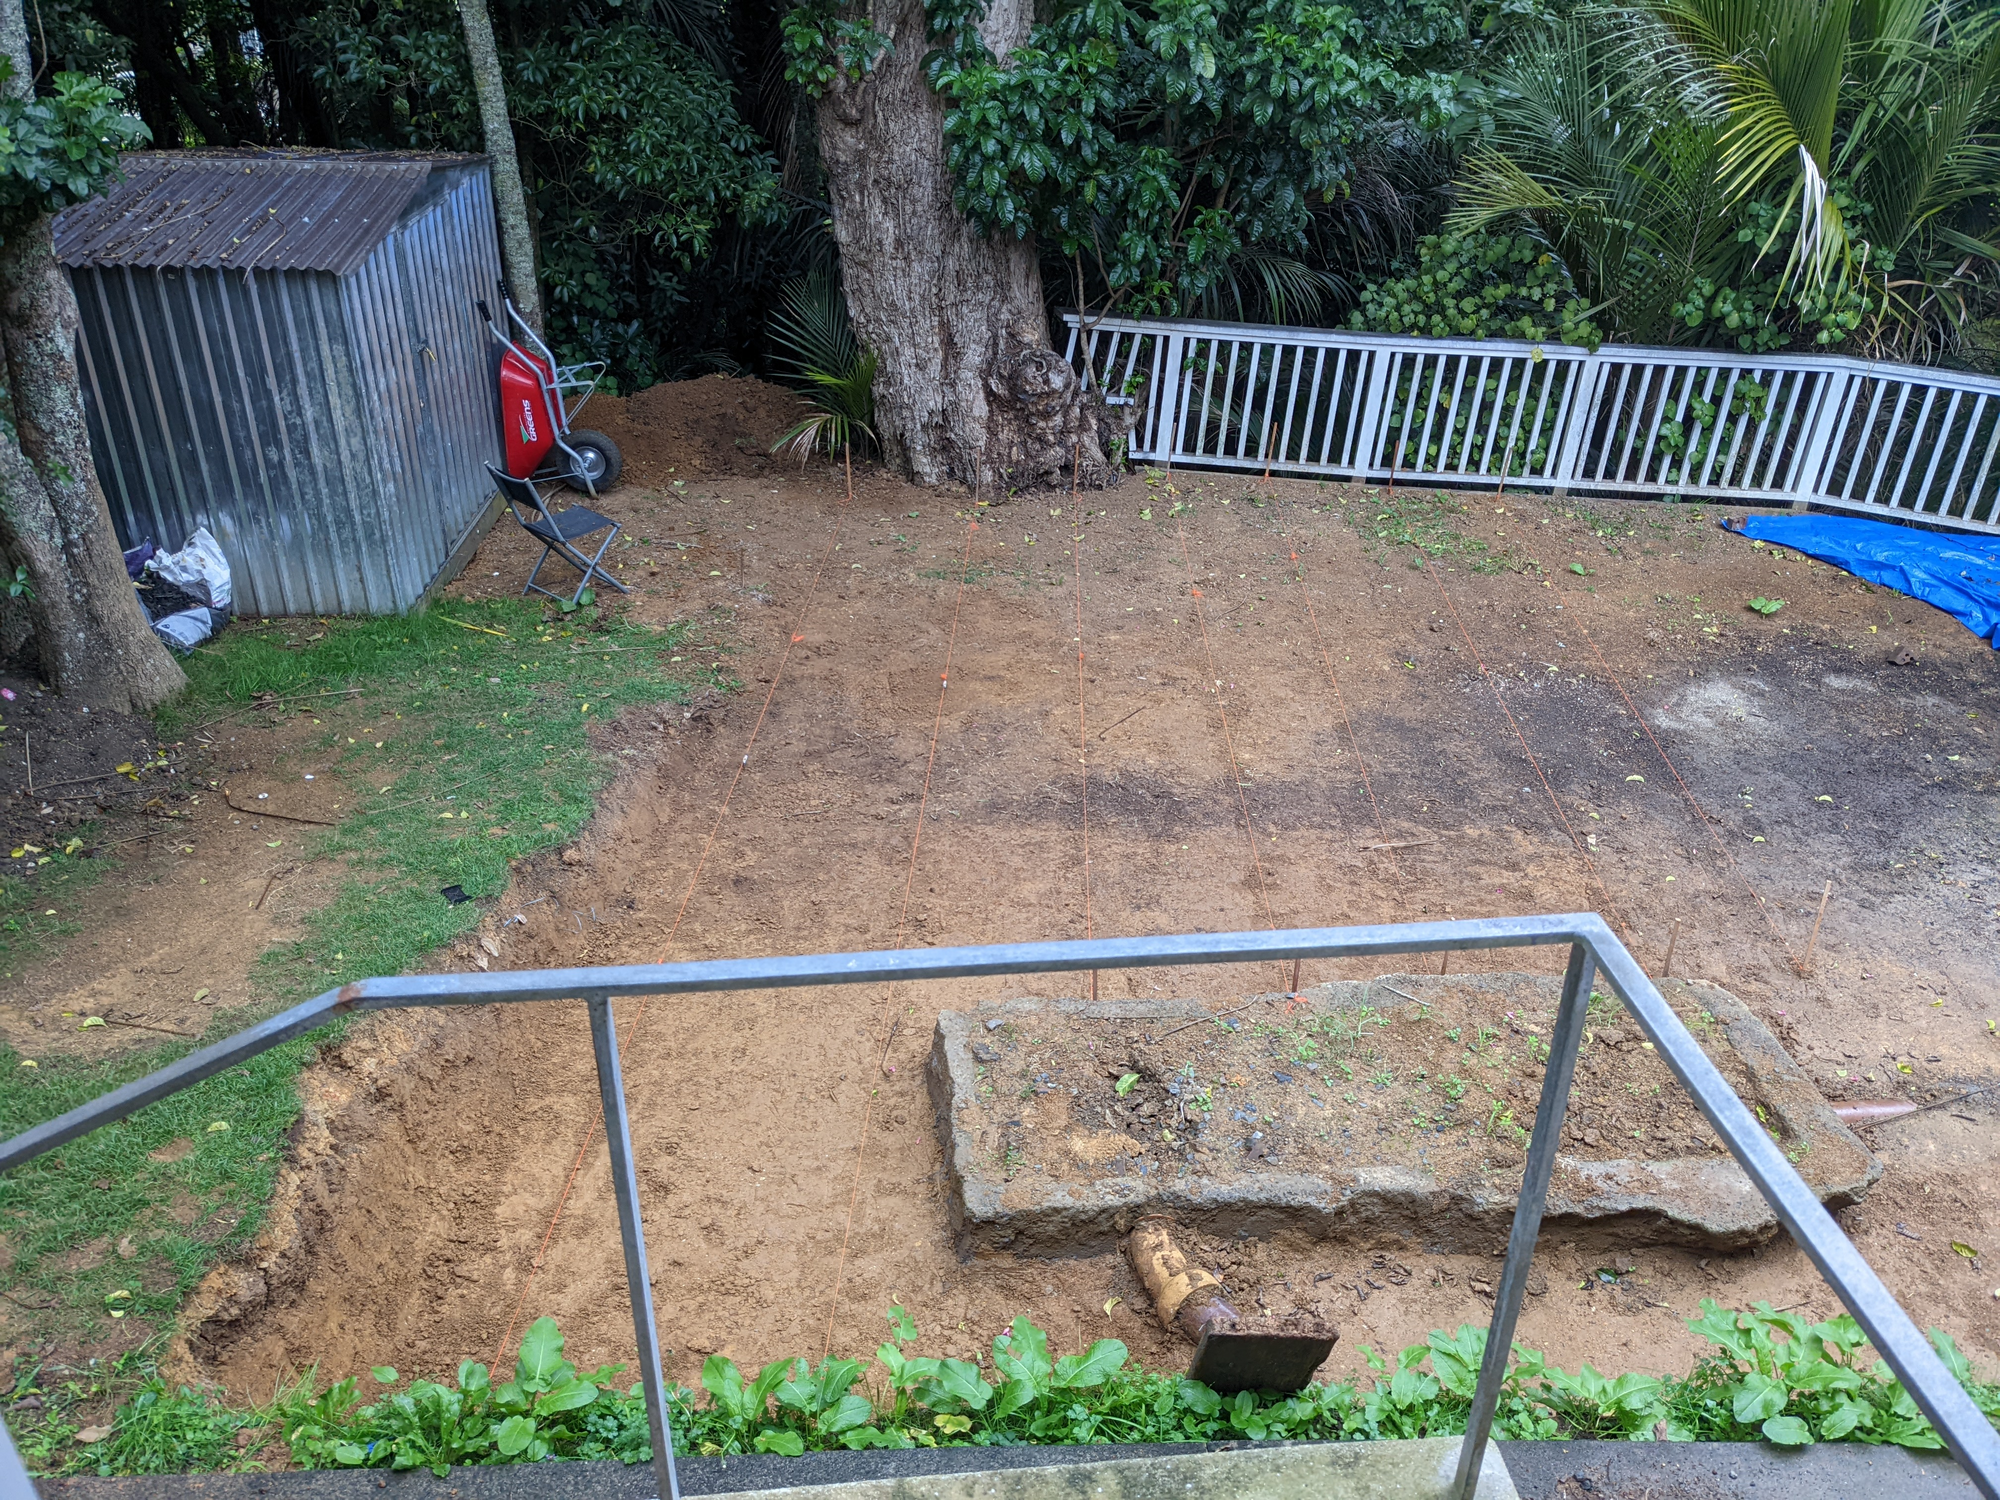
Once you've worked out the permits and pipes, you can get started by setting your string lines. I used wooden garden sticks and marked two lines on each of them with a 5cm space in between. Then I banged them into the ground until the first line was level with the ground. 5cm above the ground, where the second line was, I attached the string. Then I did the same on the other side of my yard where the higher ground was and attached the string line to the upper line making sure that the line was quite tight. Finally, I attached a line level to the line. You'll be able to see whether the line is level or not and will have to start digging to be able to bring down the stick that is on higher ground until its on the right level. I set up a zig zagging string lines every meter or so, for the first bit I dug up.
Then I set up string lines parallel to each other, 1m apart.
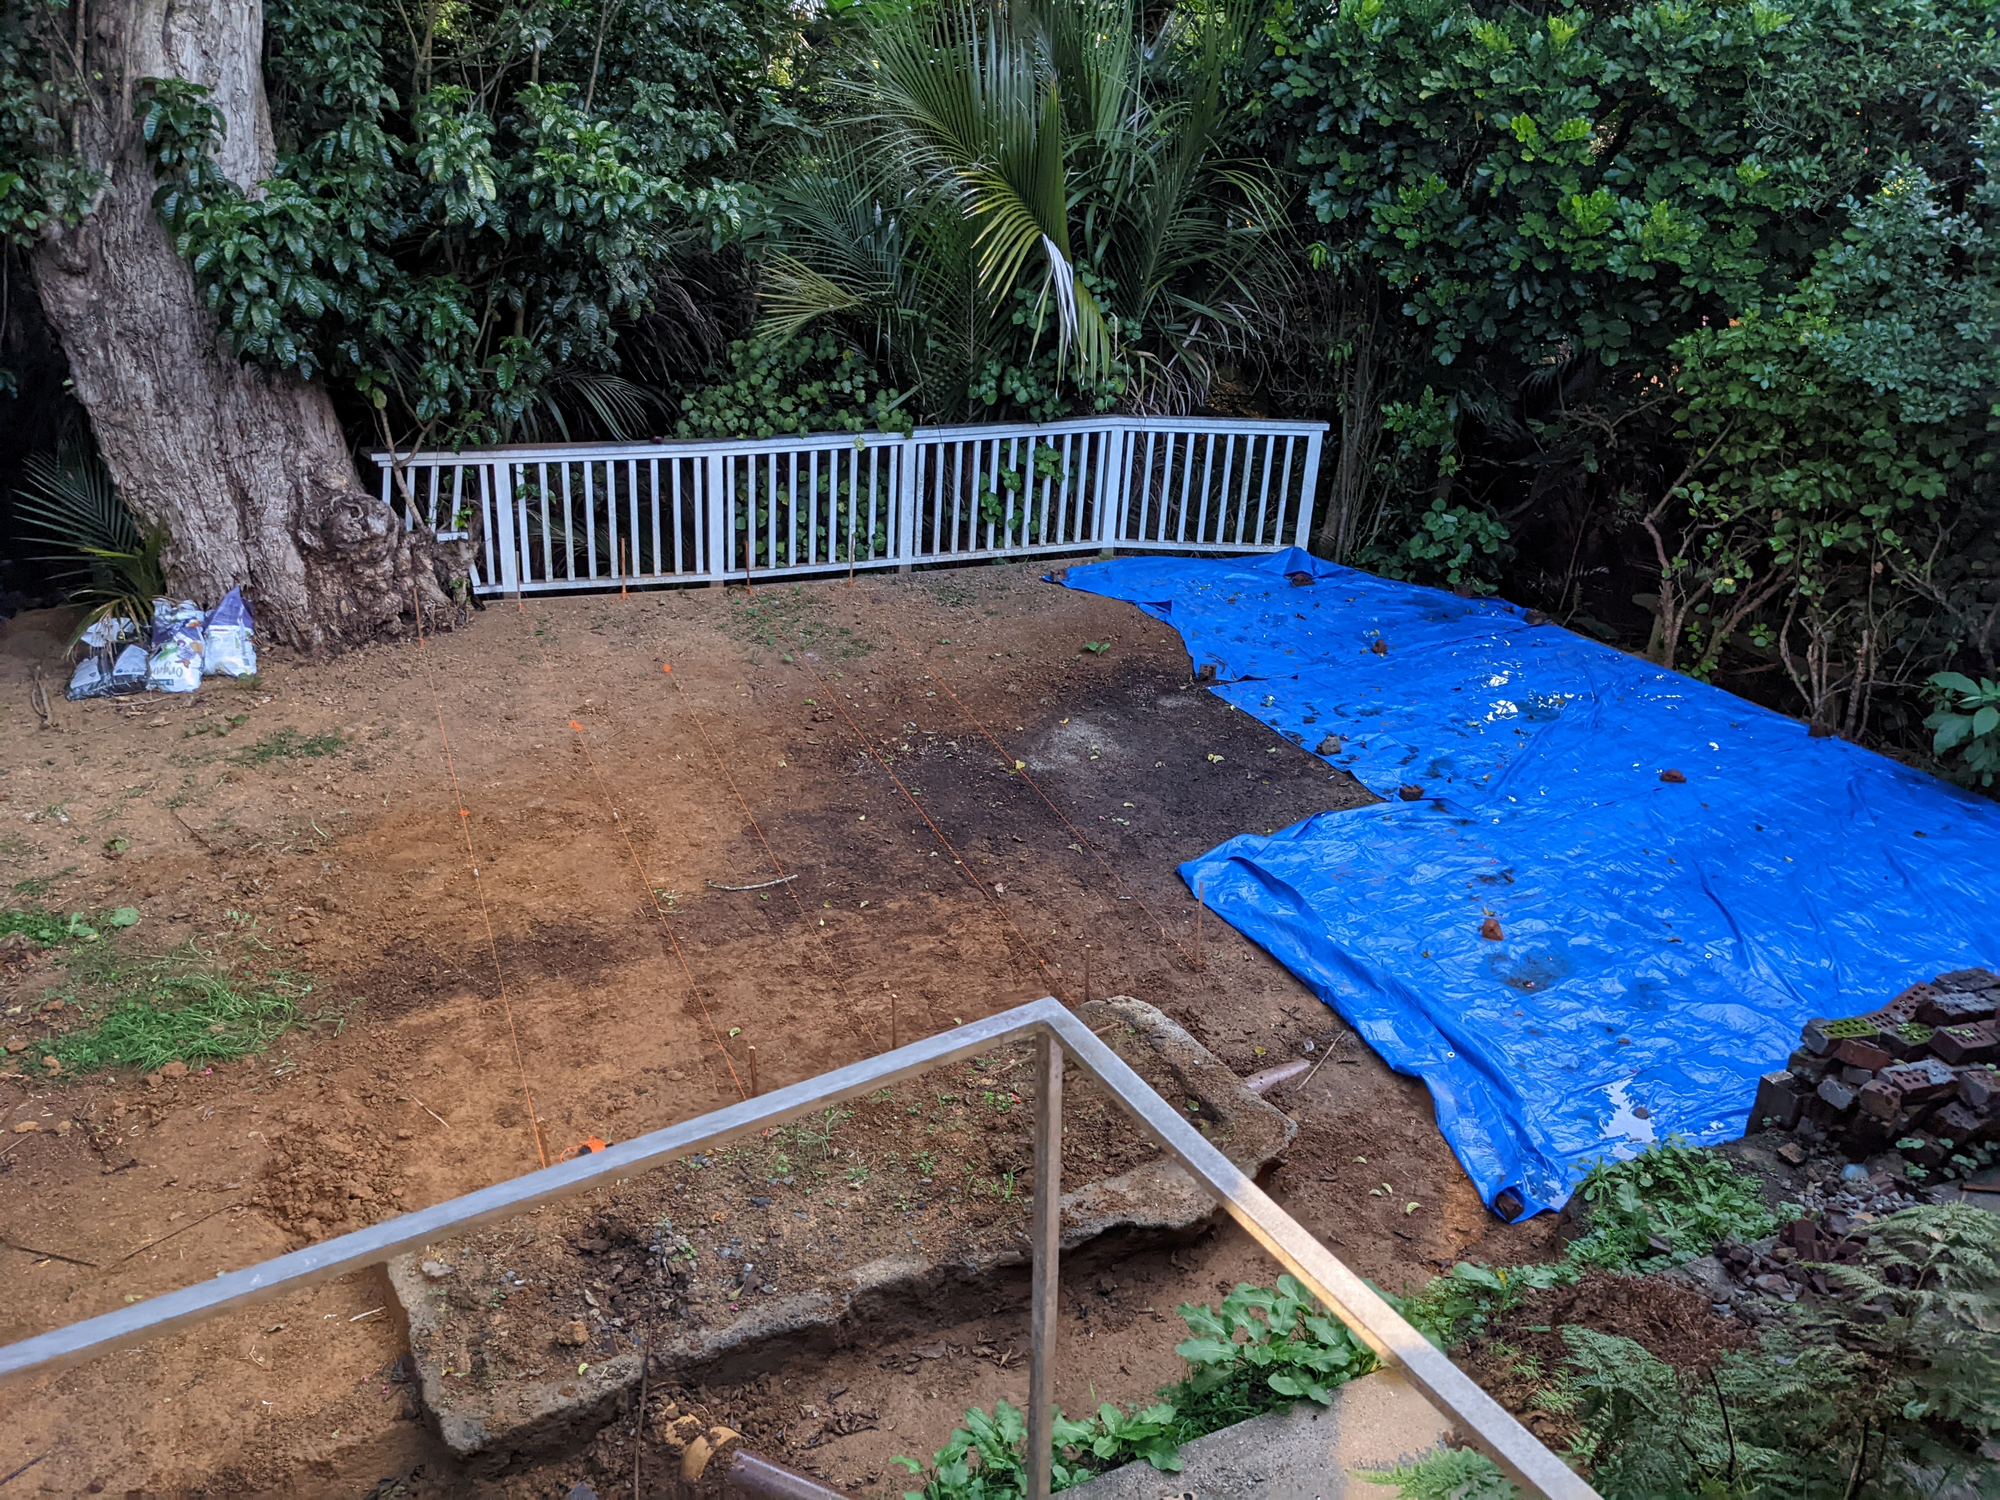
Both worked quite well. Note, where the slope is obviously quite high, you can start digging first and once you think you're getting close to being level, you set up your string line. Or you can set them up straight away and dig a trench for the string while you level the ground around it. I used tarp to cover the ground already leveled, as I didn't want weeds to grow on it. If you wonder what I did with all the soil, that I dug up? I spread the soil around the bush property surrounding my backyard. It's bush and belongs to our property, so there was no problem with that.
Allow for some extra space behind your wall
Make sure to dig up some extra space for behind your wall. You will need that extra space to put your drainage layer in. Also, you will be screwing the timber screws in from behind, as this is the most stable way of doing it. Hence, you will need to factor in enough space, so that you can drill the screws in with your drill. Then when your wall is built you will need to have some soil handy that you can back-fill this with. So make sure to keep a pile of it handy.
This digging will take a while if you do it by hand!
I dug and dug and dug for a couple of months for an hour or two every day.... I started in February and dug and leveled until, at last(!), middle of June I had done enough for the retaining wall to go in. In hindsight, a digger would have saved me lots of time, but access might have been difficult with our site. Also, I figured, that this could be my daily workout while I'm taking some time off. If you happen to break a spade while digging, I'm told that this is part of the experience.
What to do with an old septic tank?
Before I started digging I already knew that the leveling process would have the bonus of having to destroy an old septic tank that is in the way... This tank was no longer in use, disconnected and just buried in our backyard. At some point we had filled it with rubble, so that our kids couldn't fall into it. So now we had to dig out all the rubble and get rid of the tank.
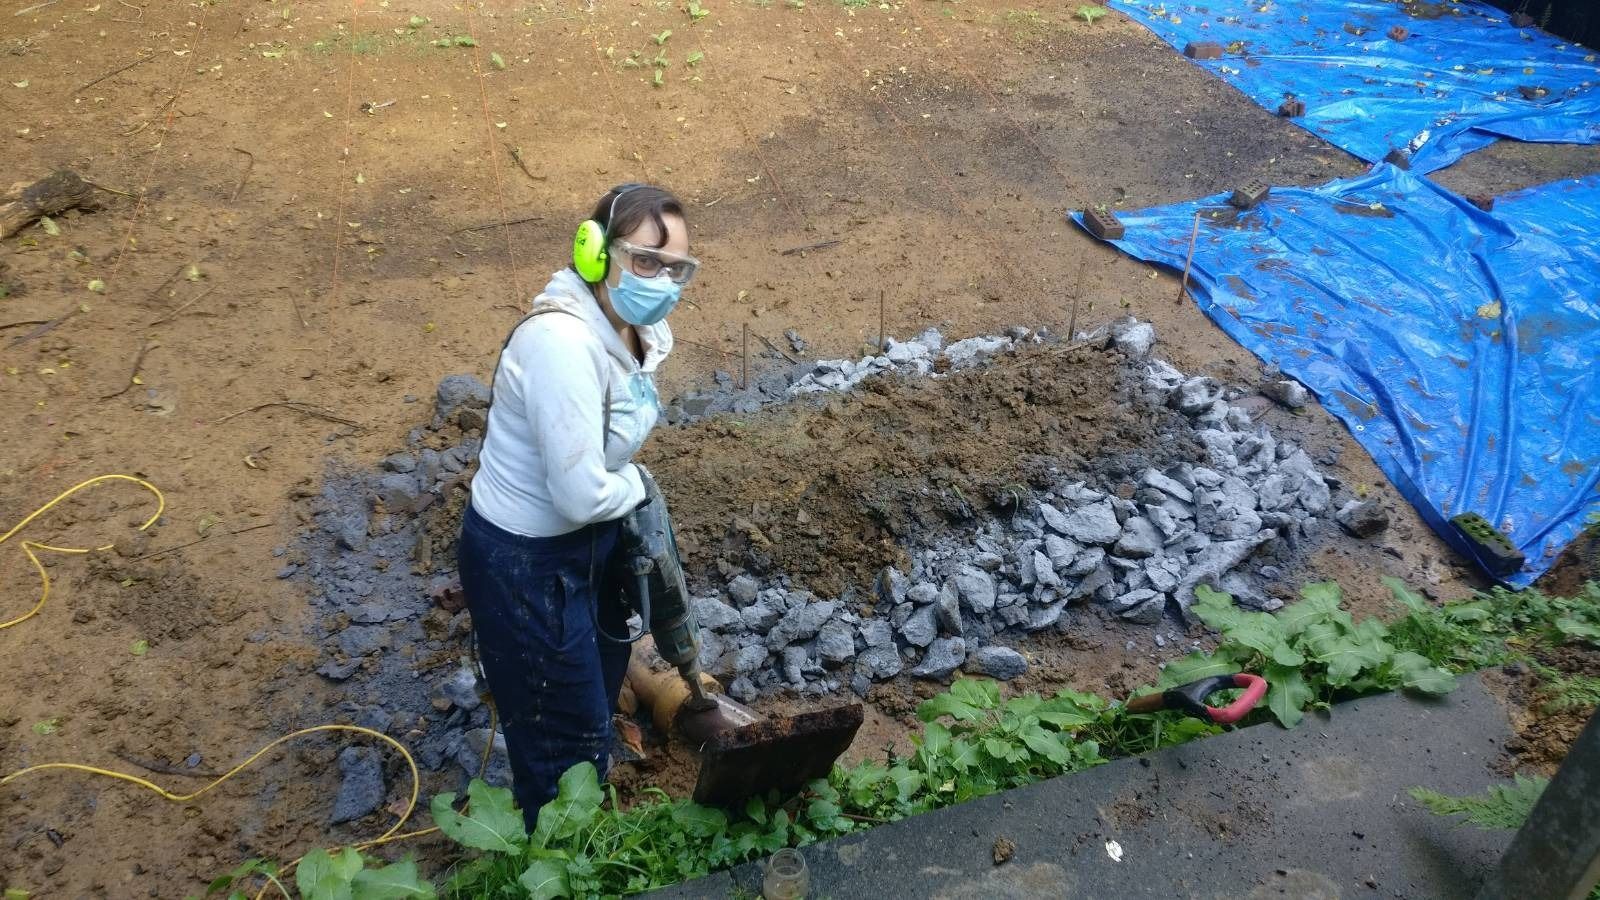
We hired a demolition breaker from our local Bunnings. I found that hiring it from the hardware store worked out much cheaper than hiring this from a company specialised in equipment hire. First the hire fee was much cheaper. Second, as this is just a side business for the hardware store, they are a lot more lenient on how long you keep the equipment for (at least at my local one). Whereas the hiring companies will be quite exact when it comes to that and will charge you extra for lateness.
We got destroying. The septic tank didn't have any steel reinforcements, luckily. So we managed to break it down, which took us about 5 hours, spread over two days. There's still some of it left. But we've destroyed enough of it, so that it won't be in our way. This is really hard work, so we found that we couldn't do this for more than 1-2 hours / day each. We needed a long hot bath after that!
What to do with all the rubble?
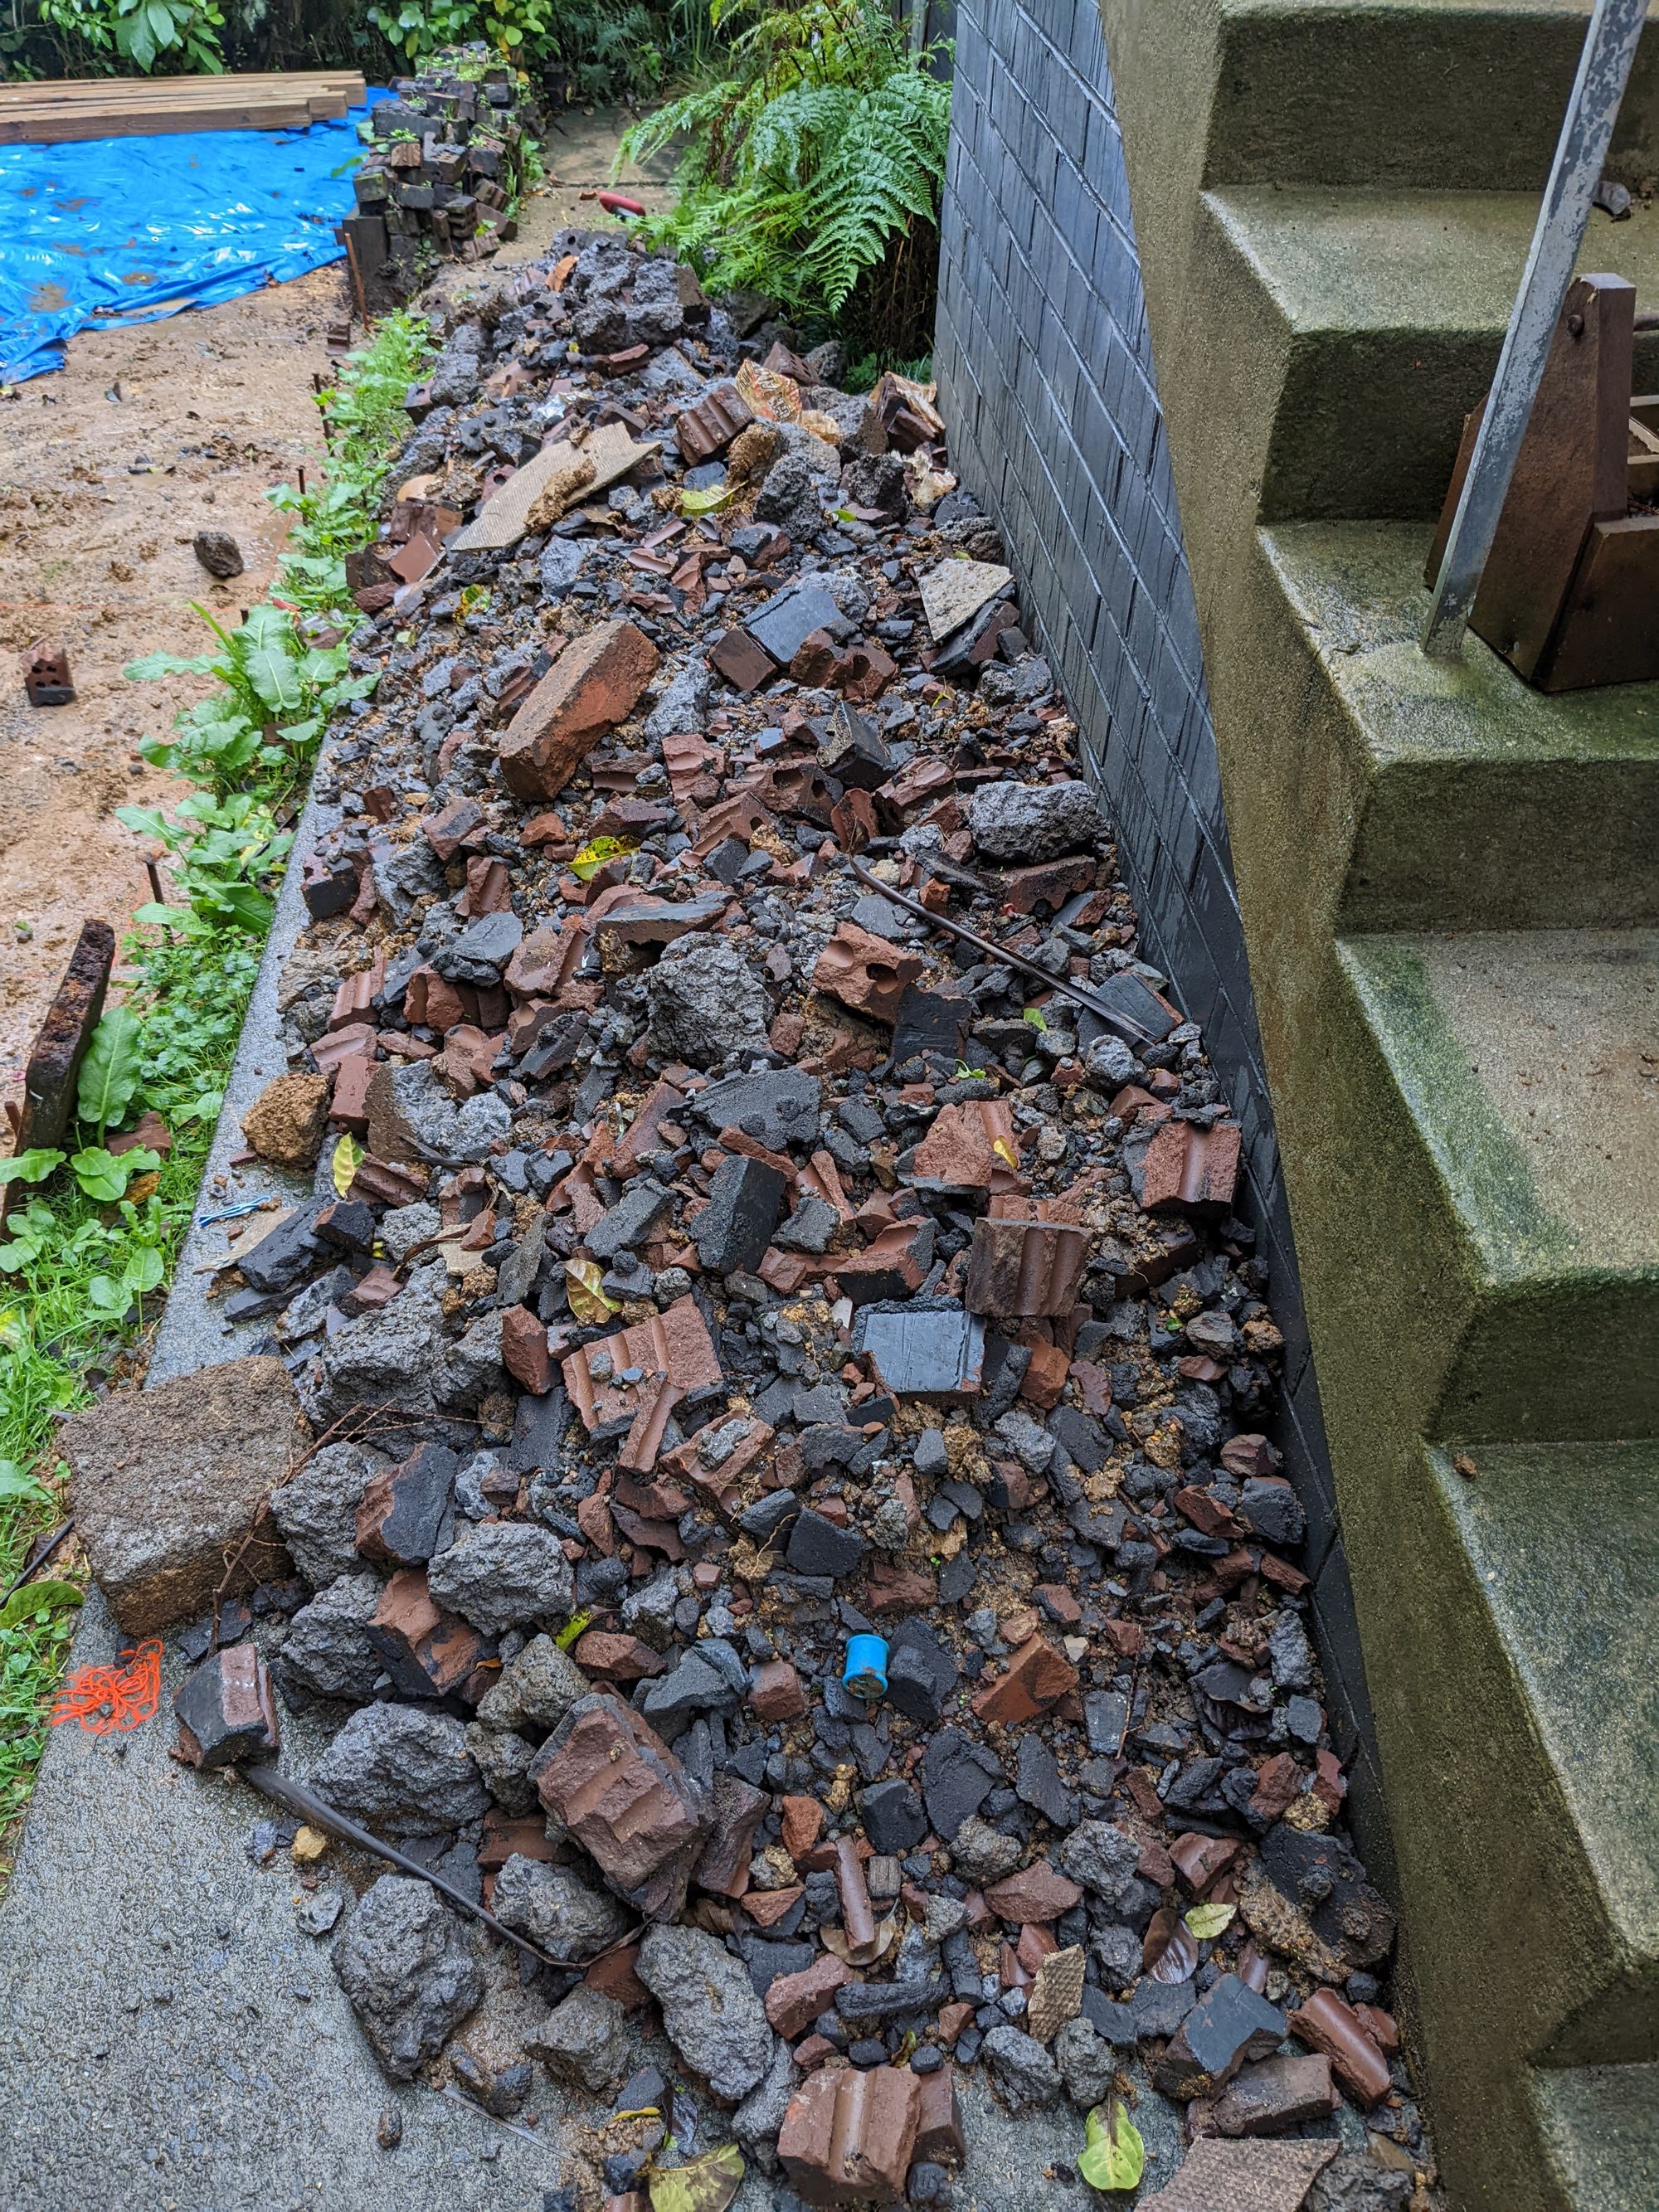
Getting rid of the rubble from the septic tank, plus my bricks from the garden beds, was another headache. I put part of the rubble behind my retaining wall. Then I researched where I can dispose of the rest. However, I've found that it's quite expensive to get rid of rubble, as the cost is based on the weight and rubble is naturally heavy. I checked out a couple of landscape yards and quarries, but found that the Auckland council refuse station seemed to be the cheapest option when disposing of hard fill. Then I figured I could try putting it all on Trade me as free bricks and hard fill... And hooray! Someone took a good chunk of the bricks off my hands for free. I was left with lots of broken bricks and rubble. I had them on Trade me for a couple of weeks, but there were no takers for them. Then a friend of mine suggested burying the rubble around my property. According to him, it helps with ground erosion and doesn't do any harm anyway (it's not toxic). As we have a big property, I decided to do this in the end. A couple of days more digging and bye bye rubble!
Subscribe to my blog if you want to find out how I built the retaining wall and more.